Exploring the Cosmos with an Astrograph
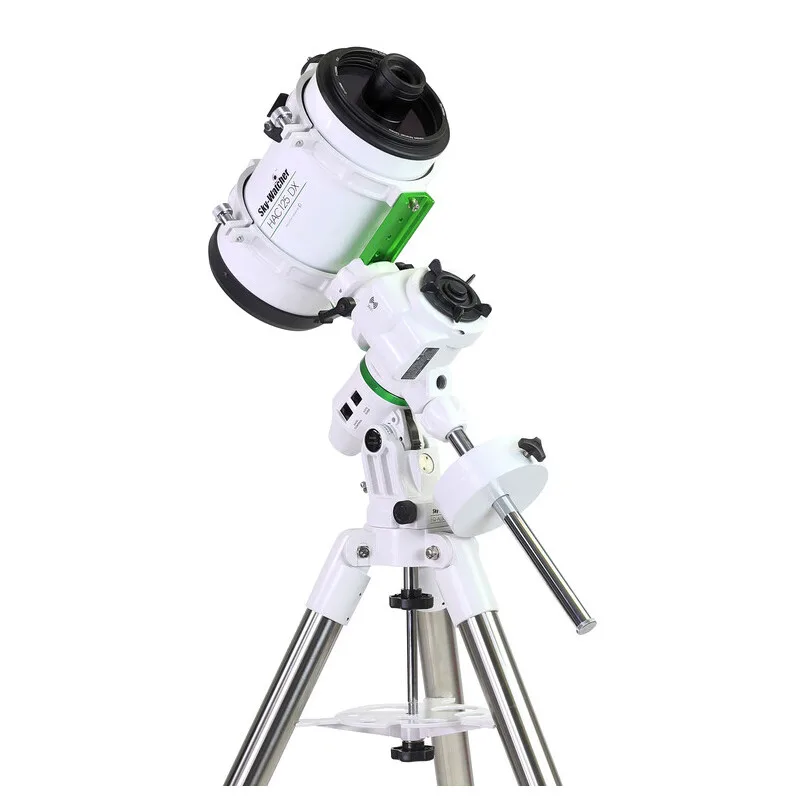
Mounted Honders Advanced Catadioptric Minigraph HAC125DX
What is an Astrograph?
An astrograph, also known as an astrographic camera, is a specialized telescope designed primarily for astrophotography – capturing images of celestial objects. Unlike standard telescopes, which can be used for both visual observation and imaging, astrographs are optimized to achieve the best possible image quality for photographic purposes.
Key characteristics of astrographs:
- Fast Focal Ratio: Astrographs typically have short focal lengths and therefore fast focal ratios (low f-numbers, often between f/2.8 and f/5). This allows them to gather light efficiently and capture images with shorter exposure times, crucial for faint deep-sky objects.
- Wide Field of View (FOV): Astrographs are designed to capture a broad expanse of the night sky, making them suitable for wide-field astrophotography of nebulae, galaxies, and star clusters.
- Flat Imaging Field: To ensure sharpness across the entire image, astrographs are engineered to produce a flat and distortion-free imaging field, especially important when using large CCD cameras or full-frame sensors.
- Precision Optics: Astrographs feature advanced optical designs to minimize aberrations like coma, astigmatism, and chromatic aberration, resulting in sharp, clear, and well-corrected images, particularly at the edges.
- Robust Construction: They are built with durable and thermally stable materials, like carbon fiber, to minimize focus drift caused by temperature changes during long exposure times.
While astrographs excel at astrophotography, many models can also be adapted for visual observation, particularly those with high-quality optics and appropriate eyepieces. However, their primary purpose and design optimizations are focused on achieving high-quality images of celestial objects for scientific research or aesthetic purposes.
Astrograph Applications
- Wide-field astronomical surveys: Used for surveying large areas of the sky, detecting objects like asteroids, meteors, and comets.
- Astrometry: Recording images for mapping the precise positions of celestial objects and creating star catalogs.
- Stellar Classification: Taking images in different colors to measure the brightness and color of stars, which helps determine their temperature and distance.
- Discovery of Astronomical Objects: Comparing images taken days or weeks apart to identify objects that have moved or changed in brightness, such as asteroids, variable stars, or novae.
Quick Overview
- Astrograph telescopes are specifically designed for astrophotography with optimized optics for capturing detailed images of deep-sky objects.
- Unlike regular telescopes, astrographs have a flat focal plane and corrected field curvature, producing sharp images edge-to-edge.
- When starting with an astrograph, proper mounting is critical - an equatorial mount with tracking capabilities is essential for long-exposure photography.
- Explore Scientific offers specialized astrograph telescopes that help even beginners capture stunning cosmic photographs with the right setup and techniques.
- The best beginner targets include the Moon, bright planets, and larger star clusters, providing satisfying results while you build your skills.
The night sky has captivated humanity since the dawn of civilization, but only in recent decades have amateur astronomers gained the ability to capture its wonders in stunning detail. An astrograph telescope opens a gateway to the cosmos that visual observation alone cannot provide, revealing colors, structures, and distant objects invisible to the naked eye. While any telescope can technically take pictures, a proper astrograph is designed specifically for this purpose, with optical systems optimized for photography rather than visual observation.
Stepping into astrophotography with an astrograph transforms how you experience the universe. Suddenly, those faint smudges of light become intricate nebulae painted in vivid reds and blues. Distant galaxies reveal their spiral arms in breathtaking detail. The moon’s surface becomes a landscape of craters, mountains, and ancient lava flows waiting to be explored through your camera lens.
What Makes Astrographs Special for Cosmic Exploration
Astrographs stand apart from conventional telescopes in their singular purpose: capturing detailed astronomical images. While many telescopes try to balance visual observation with photographic capabilities, astrographs make no such compromise. Their optical designs prioritize a wide, flat field of view specifically engineered to pair with modern camera sensors. This specialization allows astrographs to produce significantly sharper images across the entire frame—a crucial factor when photographing extensive deep-sky objects like nebulae or galaxy clusters.
The history of astrograph telescopes dates back to the late 19th century, when astronomers first adapted telescopes specifically for photography. These early instruments helped create the first comprehensive star catalogs and led to numerous astronomical discoveries. Today’s astrographs benefit from over a century of optical refinement and incorporate advanced materials and designs that early astronomers could only dream of. Explore Scientific has continued this tradition of innovation with its modern astrograph offerings, combining classical optical principles with cutting-edge technology.
Perhaps the most compelling aspect of modern astrographs is their accessibility. What once required massive observatory instruments can now be achieved with portable systems in your backyard. This democratization of astronomical imaging means anyone with passion and patience can capture images rivaling those taken by professional observatories just decades ago. The cosmic frontier has never been more accessible to explorers armed with the right tools and knowledge.
The Incredible Technology Behind Astrographs
At the heart of every astrograph lies a precisely calculated optical system designed to overcome the challenges of photographing incredibly distant and often faint objects. Modern astrographs typically employ advanced multi-lens designs that correct for various optical aberrations that would otherwise blur or distort astronomical images. These systems often include specialized elements like extra-low dispersion (ED) glass or fluorite crystals that minimize chromatic aberration—the colored fringing that can occur around bright objects.
The technological marvel continues beyond the optical tube. Today’s astrographs incorporate precision-engineered focusers capable of minute adjustments measured in microns—essential when achieving perfect focus on objects trillions of miles away. Many feature carbon fiber construction to minimize thermal expansion and contraction that could otherwise throw off critical focus during temperature changes throughout a night of imaging.
How Astrographs Differ from Regular Telescopes
The fundamental difference between astrographs and regular telescopes lies in their design priorities. Traditional telescopes are optimized for visual observation, focusing on delivering bright, high-contrast views to the human eye. Astrographs, conversely, are engineered specifically for photography, with optical systems that produce a flat focal plane across the entire field of view—crucial when working with flat camera sensors. This distinction means astrographs sacrifice some visual performance to achieve superior photographic results.
Regular telescopes often suffer from field curvature, where the focal plane forms a curved shape rather than a flat surface. This means that when observing visually, the center of the view appears in focus while the edges might not—a limitation the human eye rarely notices when looking through an eyepiece. However, this same issue becomes problematic when attaching a camera with its flat sensor, resulting in stars appearing sharp in the center but increasingly blurred toward the edges of the frame. Astrographs incorporate additional optical elements specifically to correct this field curvature.
Another key difference lies in the focal ratio. Many visual telescopes operate at relatively “slow” focal ratios (f/8 to f/12), which provide higher magnification beneficial for planetary and lunar observation. Astrographs typically feature “faster” focal ratios (f/4 to f/7) that allow shorter exposure times and wider fields of view—ideal for capturing faint deep-sky objects like nebulae and galaxies. This faster optical design represents one of the astrograph’s most significant advantages for serious astrophotography.
Essential Components of a Modern Astrograph
A complete astrograph system extends well beyond the optical tube assembly. The foundation of any serious astrophotography setup is a robust equatorial mount with precise tracking capabilities. Unlike visual astronomy, where slight tracking errors go unnoticed, long-exposure photography magnifies even the smallest mount imperfections. Quality mounts incorporate computerized tracking systems that compensate for Earth’s rotation, allowing exposures ranging from minutes to hours without star trailing.
Field flatteners and focal reducers represent another critical component in the astrograph ecosystem. These specialized optical accessories mount between the telescope and camera, further correcting field curvature while potentially decreasing focal length to achieve wider fields of view and faster exposure times. Most dedicated astrographs either include these correctors or offer them as essential accessories designed specifically for their optical systems.
Autoguiding systems serve as the final piece of the precision puzzle. These secondary cameras attach to small guide scopes or off-axis guiders and monitor a single star during long exposures. Specialized software uses this star as a reference point, sending minute correction commands to the mount whenever the star drifts from its initial position. This technological enhancement allows for pinpoint stars even in exposures spanning many minutes or hours—a requirement for capturing the faintest details in deep space objects.
Light-Gathering Power and Why It Matters
The primary function of any telescope, including astrographs, is collecting light—and in astrophotography, light gathering is everything. Unlike daytime photography, astronomical imaging deals with incredibly faint objects that emit minimal light across vast cosmic distances. The aperture (opening) of an astrograph determines how much light it can collect; larger apertures gather more light, allowing for shorter exposure times or the capture of fainter objects.
This light-gathering capability directly impacts what you can photograph and how detailed those images will be. A modest 80mm astrograph can capture impressive images of brighter targets like the Orion Nebula or Andromeda Galaxy, while larger 100-150mm instruments can reveal significantly more detail and fainter objects like distant galaxy clusters or dim planetary nebulae. Understanding this relationship helps set realistic expectations for what your particular astrograph can achieve.
Best Celestial Targets for Beginner Astrograph Users
Starting your astrograph journey with the right targets makes all the difference between frustration and triumph. For beginners, the key is selecting objects bright enough to capture without requiring advanced techniques, yet spectacular enough to showcase what your new instrument can achieve. The most successful early projects typically involve objects that don’t demand perfect tracking or extensive image processing – allowing you to focus on mastering the fundamentals of astrograph operation.
When planning your first imaging sessions, consider not just an object’s visual appeal but also its position in the sky. Targets near the zenith (directly overhead) suffer from less atmospheric distortion and light pollution than those near the horizon. Seasonal considerations matter too – the summer Milky Way offers completely different imaging opportunities than winter skies, with each season featuring its own showcase of deep-sky wonders.
Weather and moon phase significantly impact your imaging options. While experienced astrophotographers often avoid imaging during moon-lit nights, beginners can use these periods to their advantage by focusing on the moon itself or brighter planets that remain visible despite lunar interference. This approach allows you to practice your skills regardless of the lunar calendar, maximizing your learning opportunities throughout the month.
Patience remains the cardinal virtue in astrograph astronomy. Your first attempts may not match the spectacular images seen in astronomy magazines, but each session builds valuable skills and understanding. Many accomplished astrophotographers look back at their early attempts with amusement – recognizing how each imperfect image represented an essential step in their learning journey.
Top 5 Beginner Targets for Astrograph Telescopes
1. The Moon - Requires minimal exposure time and reveals incredible detail
2. Jupiter & Saturn - Bright, colorful, and feature fascinating moons and ring systems
3. Pleiades Star Cluster (M45) - Bright, blue stars with delicate nebulosity
4. Orion Nebula (M42) - Expansive and bright enough for short exposures
5. Andromeda Galaxy (M31) - Our nearest spiral galaxy neighbor, visible even in light-polluted areas
The Moon: Your First Amazing Target
The Moon presents the perfect starting point for any astrograph beginner, offering striking features visible even with modest equipment and minimal processing. Unlike deep-sky objects, lunar photography requires only short exposures (often just fractions of a second), making it forgiving of minor tracking errors or mount limitations.
Focus on capturing different lunar phases to reveal dramatically different lighting conditions – from the stark shadows along the terminator (the line between light and dark) during quarter phases to the fully illuminated detail during full moon. For particularly striking images, target the days just after the first quarter or before the last quarter when shadows create dramatic three-dimensional effects along crater walls and mountain ranges.
Bright Planets to Capture
The solar system’s gas giants offer spectacular photographic opportunities that change throughout the year as planets rotate and atmospheric features evolve. Jupiter rewards patience with its dynamic cloud bands, Great Red Spot, and constant dance of four bright moons. Saturn’s magnificent ring system never fails to impress, especially when the rings are at maximum tilt relative to Earth.
Both planets require relatively short exposures compared to deep-sky objects, though they benefit tremendously from a technique called “lucky imaging” – capturing hundreds or thousands of short video frames and stacking only the sharpest ones to defeat atmospheric turbulence. Even modest astrographs can reveal surprising planetary detail when paired with high-framerate planetary cameras and proper processing techniques.
Star Clusters Worth Exploring
1. The Pleiades (M45) - Stunning blue stars with nebulosity, visible year-round from the northern hemisphere
2. The Double Cluster in Perseus - Two adjacent star clusters creating a dazzling field of stars
3. The Beehive Cluster (M44) - Bright, scattered open cluster perfect for wider-field astrographs
4. The Hercules Globular Cluster (M13) - The northern hemisphere’s brightest globular cluster
5. The Jewel Box Cluster (NGC 4755) - A southern hemisphere gem featuring colorful, contrasting stars
Star clusters offer perfect stepping stones between lunar/planetary photography and more challenging nebulae or galaxies. Open clusters like the Pleiades or Double Cluster in Perseus feature bright stars against dark backgrounds, allowing for relatively short exposure times while still producing visually stunning results. Their scattered stellar patterns create natural test targets for your astrograph’s optical quality, revealing how well stars appear across the entire field of view.
Globular clusters present slightly more challenging targets that reward increased skill. These ancient stellar cities contain hundreds of thousands of stars packed into spherical formations, testing both your equipment’s resolving power and your processing abilities. M13 in Hercules and M3 in Canes Venatici offer northern hemisphere observers spectacular globular targets during spring and summer months, while southern hemisphere astronomers enjoy incomparable views of Omega Centauri (NGC 5139) – the largest and brightest globular cluster visible from Earth.
As your skills advance, consider capturing both wide-field views showing entire clusters and their surrounding star fields, then progressing to higher-magnification images that resolve individual stars within cluster cores. This progression naturally builds the technical skills required for more challenging deep-sky objects while producing satisfying images throughout your learning curve.
Advanced Techniques for Stunning Cosmic Photos
Once you’ve mastered the basics with bright, forgiving targets, a world of advanced techniques awaits to transform your cosmic photography. The transition from beginner to intermediate astrophotographer often begins with implementing more sophisticated capture methods that overcome the fundamental challenges of shooting extremely faint objects in light-polluted skies. Explore Scientific’s astrograph telescopes provide the optical foundation, but mastering these techniques truly unlocks their capability to produce gallery-worthy images of the cosmos.
Long Exposure Photography Basics
Long exposure photography forms the cornerstone of deep-sky imaging, allowing your camera to collect sufficient light from incredibly distant and faint objects. Unlike daytime photography, where exposures typically range from fractions of a second to perhaps a few seconds, astrophotography often requires exposures spanning minutes or even hours to reveal the faintest details in nebulae and galaxies.
Achieving these long exposures demands precise polar alignment of your equatorial mount, which aligns the mount’s rotational axis with Earth’s axis of rotation. This critical setup step ensures your telescope can accurately track celestial objects as Earth rotates, keeping stars perfectly pinpoint throughout extended exposures. Start with exposure times of 30-60 seconds while learning, gradually extending to 3-5 minutes as your tracking accuracy and confidence improve.
Image Stacking to Reduce Noise
Perhaps the most transformative technique in modern astrophotography is image stacking – capturing multiple exposures of the same target and combining them digitally to improve signal-to-noise ratio. Every digital image contains random electronic noise that competes with the faint signal from astronomical objects. By stacking multiple images, random noise tends to average out while the consistent signal (the actual celestial object) reinforces itself, dramatically improving image quality.
Begin with stacking 10-20 exposures of the same length, ensuring your mount’s tracking remains accurate throughout the sequence. Free software like DeepSkyStacker or Sequator makes this process accessible to beginners, automatically aligning stars across frames before combining them. More advanced astrophotographers often capture hundreds of sub-exposures across multiple nights, accumulating many hours of total exposure time on particularly challenging targets.
Alongside your “light frames” (actual images of your target), capture calibration frames to further improve image quality. Dark frames (exposures with the lens cap on) record sensor noise patterns, bias frames (very short dark exposures) capture electronic readout patterns, and flat frames (evenly illuminated exposures) correct for dust spots and vignetting. These calibration frames allow processing software to remove systematic errors from your final image, revealing previously invisible details.
Tracking Moving Objects Across the Night Sky
Autoguiding represents a significant leap forward in tracking precision, enabling much longer individual exposures without star trailing. This technique uses a secondary camera attached to either a separate guide scope or an off-axis guider to monitor a single star continuously during exposure. Specialized software measures tiny movements in this guide star and sends correction commands to the mount, compensating for mechanical imperfections that would otherwise limit exposure times.
Entry-level autoguiding setups have become remarkably affordable, with dedicated guide cameras starting around $150 and small guide scopes under $200. The investment pays tremendous dividends in image quality by allowing longer exposures with perfectly round stars. Popular software options like PHD2 Guiding (Push Here Dummy) have simplified what was once a complex process, making autoguiding accessible even to relatively new astrophotographers.
Autoguiding Equipment Essentials
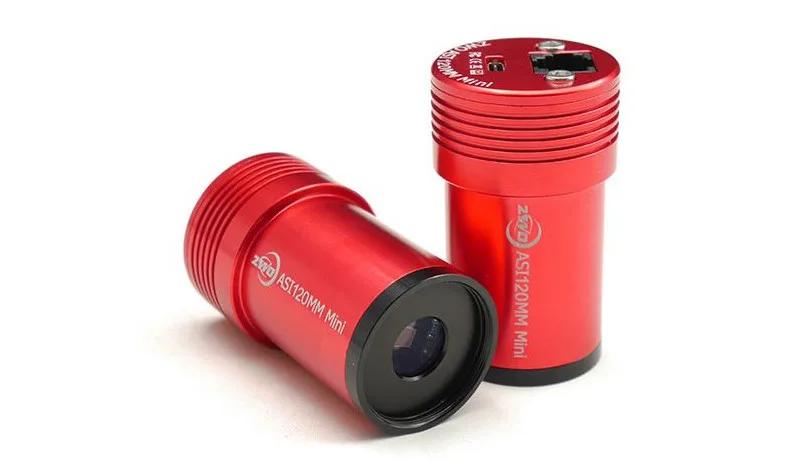
1. Guide Camera: Dedicated high-sensitivity camera (ZWO ASI120MM Mini recommended for beginners)
2. Guide Scope: Small refractor telescope (50-60mm aperture) or off-axis guider
3. Connection Cables: ST4 cable or direct computer control via USB
4. Software: PHD2 Guiding (free) or integrated module in capture software
5. Computer: Laptop or mini PC for field operation (can run simultaneously with the main camera)
For particularly challenging targets, consider implementing dithering – a technique where the autoguiding system intentionally shifts the telescope position slightly between exposures. This prevents fixed-pattern noise from reinforcing itself during stacking and helps eliminate hot pixels or other sensor artifacts that might otherwise mar your final image. Most modern capture software offers integrated dithering controls that work seamlessly with autoguiding systems.
Processing Your Images to Bring Out Details
The digital darkroom represents the final frontier in creating truly spectacular astronomical images. Raw data straight from the camera rarely resembles the colorful, detailed images we associate with astrophotography – proper processing techniques are essential to reveal the hidden beauty captured by your astrograph. Begin with basic adjustments like stretching (increasing contrast in the very dark portions of the image), color calibration to achieve natural star colors, and noise reduction to smooth background areas while preserving detail in celestial objects.
As your skills advance, explore more sophisticated techniques like star reduction (subtly decreasing star size to emphasize nebulosity), selective contrast enhancement to bring out faint structural details, and color saturation adjustments to enhance the natural colors of emission nebulae or star clusters.
Programs like PixInsight offer powerful astrophotography-specific tools, while more familiar options like Adobe Photoshop with specialized astronomy plugins provide accessible entry points for those already comfortable with photo editing. Remember that effective processing enhances what was actually captured by your astrograph rather than creating fictional details – the goal is to reveal truth rather than manufacturing it.
Common Challenges and How to Overcome Them
Every astrophotographer, regardless of experience level, encounters obstacles that can frustrate their cosmic pursuits. Recognizing these common challenges and implementing proven solutions transforms potential disappointment into valuable learning opportunities. Many nights that might have ended in frustration can be salvaged with the right troubleshooting approach and realistic expectations about what’s achievable under different conditions.
Technical difficulties often appear most daunting when first encountered, but experienced astrophotographers develop systematic approaches to identify and resolve issues. Keep detailed notes about your equipment configurations, camera settings, and environmental conditions during each session. These records prove invaluable when troubleshooting inconsistent results or planning future imaging sessions. Remember that even professional observatories experience technical challenges – patience and methodical problem-solving separate successful astrophotographers from those who abandon the hobby in frustration.
Dealing with Light Pollution
Light pollution presents perhaps the most universal challenge for modern astrophotographers, with truly dark skies becoming increasingly rare. Rather than surrendering to urban glow, implement targeted solutions to minimize its impact on your images. Narrowband filters offer the most powerful defense, allowing only specific wavelengths of light emitted by nebulae to reach your sensor while blocking most artificial light sources. These specialized filters enable remarkable deep-sky imaging even from suburban or urban locations, though they typically work best with emission nebulae rather than galaxies or reflection nebulae.
When narrowband filtration is not practical, consider modifying your target selection based on your light pollution conditions. Brighter objects like open star clusters, planetary nebulae, and the brighter galaxies remain accessible even from moderately light-polluted locations.
For truly dark-sky dependent targets like faint galaxy groups or the Milky Way’s delicate dust lanes, plan occasional trips to darker locations, treating these expeditions as special opportunities to capture targets beyond your typical reach. Many astronomy clubs organize dark-sky imaging events, providing both darker sites and valuable community knowledge to maximize these opportunities.
Solving Focusing Problems
Achieving perfect focus represents one of astrophotography’s most fundamental yet challenging tasks, particularly since the human eye can’t accurately judge focus on a camera’s dim live view screen. Invest in a quality Bahtinov mask – an ingenious focusing aid that creates a distinctive diffraction pattern around bright stars, making even tiny focusing adjustments immediately visible. These inexpensive accessories transform focusing from frustrating guesswork into a precise, repeatable process, especially when coupled with your camera’s live view magnification feature.
Temperature changes throughout the night can shift your astrograph’s focus point as optical components and the focusing mechanism expand or contract. High-end setups often incorporate automated focus systems, but beginners can implement simpler solutions like checking focus periodically throughout the night or using focus locks to prevent unintended movement. For ultimate precision, consider retrofitting your astrograph with a motorized focuser controlled via computer software, allowing automated focusing routines that achieve consistency impossible with manual methods.
Preventing Camera Shake
Camera shake represents the silent destroyer of otherwise perfect astronomical images, rendering stars as streaks rather than pinpoints and ruining hours of careful setup. The most effective prevention begins with a solid foundation – choose a telescope mount rated for at least 1.5 times the weight of your complete imaging setup. Remember that even high-quality mounts can transmit vibrations from surrounding ground, so avoid setting up on wooden decks or near roadways where passing vehicles create subtle vibrations.
Consider implementing a hands-off approach to camera operation using either remote shutter releases or—preferably—complete computer control of your camera. Every physical interaction with your equipment introduces vibration, so minimizing direct contact during imaging sessions dramatically improves results. Many astrographs now support complete remote operation via laptop or even smartphone, allowing you to control every aspect of image acquisition without ever touching the telescope after initial setup.
The History and Evolution of Astrographs
The astrograph’s journey begins in the late 19th century when astronomers first recognized the tremendous scientific potential of attaching cameras to telescopes. The watershed moment came in 1887 with the international Carte du Ciel (Map of the Sky) project, which commissioned specialized astrograph telescopes at observatories worldwide to create the first photographic star atlas.
These early instruments featured relatively simple optical designs by modern standards, yet they revolutionized astronomy by creating permanent photographic records that could be studied long after the observation night ended. The project’s ambitious goal of mapping the entire sky catalyzed rapid innovation in astronomical photography that continues to this day through increasingly sophisticated instruments available to both professionals and amateurs.
From Glass Plates to Digital Sensors
The evolution of astrograph recording media tells a fascinating story of technological progress. Early astrophotographers painstakingly prepared glass plates coated with light-sensitive emulsions, often requiring exposures of many hours to capture faint celestial objects. These fragile plates required delicate chemical development processes but rewarded astronomers with unprecedented views of the cosmos.
The mid-20th century brought photographic film, increasing sensitivity and convenience while still demanding darkroom skills to process results. The true revolution came with charge-coupled devices (CCDs) in the 1980s, followed by CMOS sensors in recent decades, transforming astrophotography from chemical to digital processes. Today’s sensors can detect single photons with extraordinary efficiency, revealing in minutes what would have required all-night exposures on glass plates, while capturing millions of pixels of data that can be instantly shared worldwide.
Famous Discoveries Made with Astrographs
Astrographs have played pivotal roles in expanding our cosmic understanding, enabling discoveries impossible through visual observation alone. In 1930, Clyde Tombaugh used systematic photographic comparisons with an astrograph to discover Pluto, painstakingly comparing plates to detect the tiny moving point of light among thousands of stars.
Tombaugh discovered the planet using a 13-inch refractor astrograph at the Lowell Observatory. He exposed photographic plates with the telescope for extended periods, capturing images of the night sky. He then used a blink comparator to compare two plates taken on different dates. By rapidly switching between the two images, Tombaugh identified a faint point of light that appeared to “jump” or move relative to the fixed stars, indicating a celestial body. This moving dot was Pluto, found on February 18, 1930, after months of meticulous work.
The Hubble Space Telescope—essentially an orbiting astrograph free from atmospheric interference—has transformed our understanding of cosmic evolution with its ultra-deep field images revealing galaxies from the universe’s infancy. Perhaps most dramatically, specialized astrographs monitoring seemingly empty patches of sky have discovered thousands of exoplanets through the transit method, detecting the tiny dimming of stars as planets pass in front of them—a feat impossible without the precise photometric capabilities of modern digital astrographs.
Even amateur astrographs have contributed meaningfully to science, with backyard astronomers discovering comets, supernovae, and asteroids using equipment similar to what’s available to today’s beginners. This democratization of astronomical discovery represents one of the most exciting aspects of modern astrograph technology—the line between professional and amateur capabilities continues to blur, creating unprecedented opportunities for citizen scientists to make genuine contributions to our understanding of the Universe.
Your Cosmic Journey Begins Tonight
The path to mastering astrograph photography doesn’t require perfect equipment or pristine dark skies—it simply demands curiosity and persistence. Begin with modest expectations, celebrating small victories like your first clearly focused star cluster or the delicate details captured in a lunar crater. Each imaging session builds skills that transfer to progressively more challenging targets, gradually expanding your cosmic portfolio from bright Solar System objects to the faintest galaxy clusters at the edge of visibility.
Join online communities dedicated to astrograph imaging, where beginners find encouragement and veterans freely share hard-won knowledge. Sites like Cloudy Nights, Astrobin, and various social media groups provide both technical support and creative inspiration while connecting you with fellow cosmic explorers worldwide. Don’t hesitate to share your early attempts, however imperfect—experienced imagers often provide specific suggestions that dramatically accelerate your learning curve.
Remember that every iconic astronomical image you’ve admired represents countless hours of practice, technical learning, and often multiple failed attempts before success. The journey itself—full of technical challenges, breakthrough moments, and nights of quiet wonder under star-filled skies—provides rewards beyond the images themselves. With each session, you’re not merely taking pictures; you’re developing a direct, personal connection to the universe that has fascinated humanity since we first looked upward and wondered what lies beyond.
FAQs
The world of astrograph astronomy comes with unique terminology, technical considerations, and practical challenges that often raise questions for newcomers. Below are answers to the most common inquiries from beginning astrograph users, providing straightforward guidance to help navigate initial confusion and set realistic expectations. These responses distill years of collective experience from the astrophotography community, offering shortcuts around common pitfalls while encouraging an approach balancing technical precision with the simple joy of cosmic exploration.
Remember that every accomplished astrophotographer began as a complete novice, facing the same questions and challenges you’re encountering now. The learning curve may seem steep initially, but each small success builds confidence and capabilities for the next challenge. The most important quality for success isn’t technical expertise or expensive equipment, but rather persistence—the willingness to learn from both successes and inevitable setbacks on your journey to capturing the cosmos.
As you progress beyond these basic questions, specialized online communities provide invaluable resources for addressing the increasingly specific challenges encountered at advanced levels. Websites like Cloudy Nights feature dedicated forums where experts generously share solutions to even the most obscure technical issues, while platforms like Astrobin showcase what’s possible with various equipment combinations, providing both inspiration and practical examples of different imaging approaches.
How much should I expect to spend on a good beginner astrograph?
A complete beginner astrograph system typically requires an investment between $1,200-$3,000 for meaningful results. This budget includes a quality small refractor astrograph ($500-$1,000), a sturdy computerized equatorial mount ($500-$1,200), and essential accessories like field flatteners, guide systems, and camera adapters ($200-$800). While budget options exist below this range, they often introduce frustrating limitations that discourage newcomers. Remember that your camera represents an additional investment if you don’t already own a suitable DSLR or dedicated astronomy camera.
Consider starting with a high-quality mount paired with a modest optical tube, rather than the reverse. An excellent mount with average optics will consistently outperform excellent optics on an inadequate mount. Many experienced astrophotographers recommend allocating at least 50% of your initial budget to the mounting system, recognizing it as the true foundation of successful imaging. Explore Scientific offers several astrograph packages that thoughtfully balance optical performance with mounting requirements, providing optimized starting points for various budget levels.
Can I use my DSLR camera with an astrograph?
Modern DSLR and mirrorless cameras make excellent partners for astrograph telescopes, offering an accessible entry point without requiring specialized astronomy cameras. Nearly any DSLR with manual exposure control and raw file capability can capture impressive astronomical images when properly connected to an astrograph using a T-ring adapter specific to your camera brand.
Canon cameras have traditionally been popular for astrophotography due to their extensive third-party modification options, though recent Nikon, Sony, and other models perform admirably as well. For optimal results, consider cameras with good high-ISO performance and full-frame sensors, though even crop-sensor cameras capture stunning images with appropriate focal length telescopes.
As your skills advance, you might consider having your DSLR “astro-modified” by specialist companies that remove the internal infrared filter, dramatically improving sensitivity to the hydrogen-alpha wavelength that dominates many nebulae. This modification renders the camera less suitable for regular daytime photography but significantly enhances its astronomical capabilities, particularly for capturing the striking red regions in emission nebulae that standard cameras struggle to record effectively.
Alternatively, dedicated astronomical cameras from companies like ZWO, QHY, and Atik offer specialized features like extreme cooling systems that reduce noise during long exposures, though they typically cost more and require laptop control rather than functioning as standalone devices.
Do I need dark skies to use an astrograph effectively?
While truly dark skies certainly enhance astrophotography possibilities, modern equipment and techniques make impressive results possible even from light-polluted suburban or urban locations. Narrowband filters that isolate specific wavelengths emitted by nebulae can effectively cut through light pollution, and specialized light pollution filters help when imaging broader spectrum targets.
Many stunning images of planets, the moon, star clusters, and brighter nebulae have been captured from surprisingly light-polluted locations through careful technique and appropriate targets. Rather than viewing light pollution as an insurmountable obstacle, consider it a challenge that shapes your imaging choices and techniques—certain objects remain perfectly accessible while others might require occasional trips to darker locations.
How long does it take to learn astrograph photography?
Expect a gradual learning curve spanning months rather than days, with satisfying milestones throughout the journey. Most beginners capture pleasing lunar and planetary images within their first few sessions, while basic deep-sky imaging of brighter targets typically requires 5-10 dedicated nights to master fundamental techniques.
Developing advanced skills like narrowband imaging, sophisticated processing techniques, and imaging of challenging faint objects often requires 1-2 years of consistent practice. The most successful beginners focus on thoroughly learning one technique before adding complexity, building a solid foundation rather than attempting advanced methods prematurely. Remember that even experienced astrophotographers continuously refine their techniques—the learning process becomes part of the enjoyment rather than merely a prerequisite to it.
What software is best for processing astrograph images?
Begin with user-friendly options like DeepSkyStacker (free) for image stacking and initial processing, paired with familiar photo editors like Adobe Photoshop, Affinity Photo, or the free GIMP for final adjustments. As your skills advance, dedicated astrophotography software like PixInsight offers powerful specialized tools designed specifically for astronomical image processing, though with steeper learning curves and higher costs.
Many beginners find the SiriL (free) and Astro Pixel Processor (paid) offer good balances between power and accessibility. The ideal approach starts simple and gradually incorporates more sophisticated tools as your processing skills develop alongside your imaging techniques. Regardless of software choice, numerous excellent tutorials exist online for each program, making the learning process straightforward for motivated beginners.
For complete system control during imaging sessions, consider dedicated capture software like Sequence Generator Pro, NINA, or SharpCap that can automate everything from focusing to filter changes throughout the night. These powerful programs allow you to set up sophisticated imaging sequences and then let the computer handle execution while you enjoy the night sky or even get some sleep—transforming what would be exhausting manual processes into efficient automated sessions.
Introducing...
Honders Advanced Catadioptric Minigraph HAC125DX
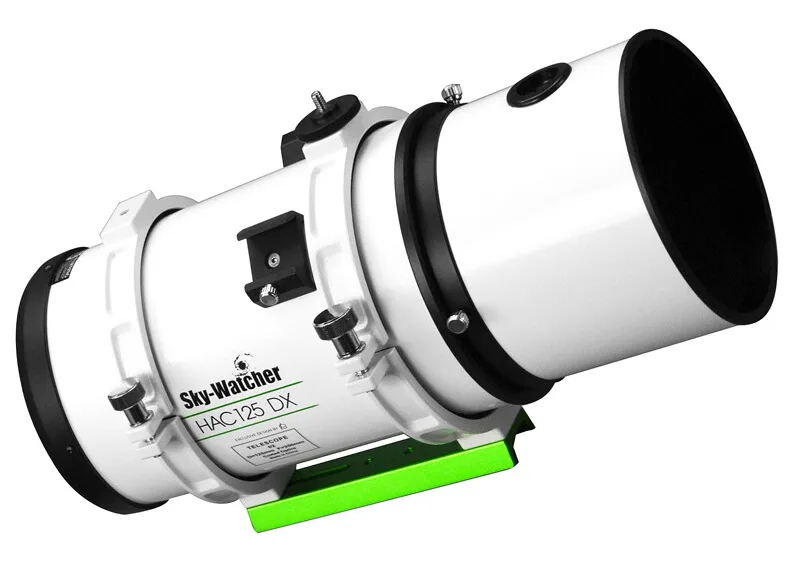
Honders Advanced Catadioptric Minigraph HAC125DX
The Honders Advanced Catadioptric (HAC125DX) Minigraph is the smallest and fastest astrograph of its kind—delivering exceptional speed and precision in an ultra-compact design.
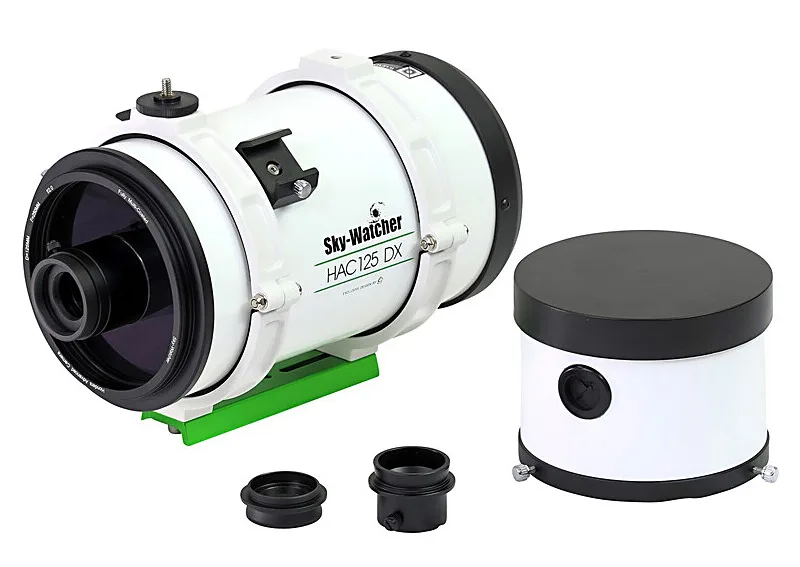
Using a unique hybrid optical system that combines refractive and reflective elements, the HAC125DX maximizes light transmission to produce sharp, bright images with outstanding clarity. This advanced catadioptric design yields the sharpest, fastest, and lightest mini-astrograph currently available.
Unlike traditional small refractor astrographs, the HAC125DX features an incredibly fast f/2 focal ratio, enabling you to capture images up to five times quicker than with a standard f/4.9 optic. This means more data in less time, shorter exposures, and imaging sessions without the need for autoguiding.
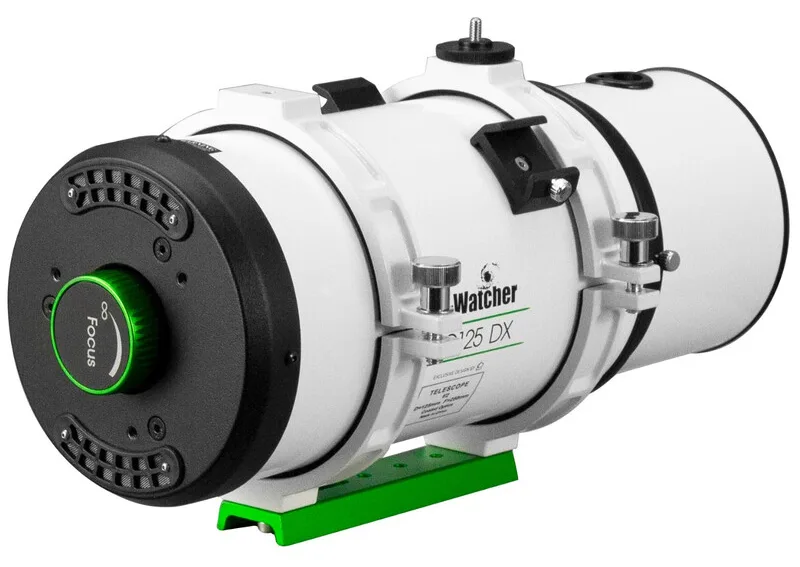
Building on the success of the original HAC125, the DX model introduces a rear focusing mechanism on the primary mirror. This improvement not only simplifies focusing during use but also provides compatibility with a wider range of modern imaging cameras. With a 16 mm image circle, it is perfectly matched to popular sensors such as the IMX533 and IMX585.
Despite its compact length of just 40 cm, the HAC125DX provides a powerful and portable imaging platform suitable for both beginner astrophotographers and seasoned imagers. Designed as the ultimate grab-and-go astrograph, its fast optics and lightweight build make it ideal for travel and quick setup. Pair it with your favorite portable mount, and you’ll be ready to capture the night sky in minutes.
The HAC125DX isn’t just another astrograph—it’s a Minigraph. Compact, versatile, and adventure-ready, it brings professional-level imaging performance wherever your astronomy journey takes you.
While “astrograph” is a general term for telescopes optimized for astrophotography, a Minigraph is a specific type of astrograph, often referring to a compact and portable version.
Here’s how they relate:
Think of it like this: all Minigraphs are astrographs, but not all astrographs are Minigraphs. Minigraphs prioritize portability and speed, making them ideal for “grab-and-go” astrophotography and capturing wide-field images of deep-sky objects.
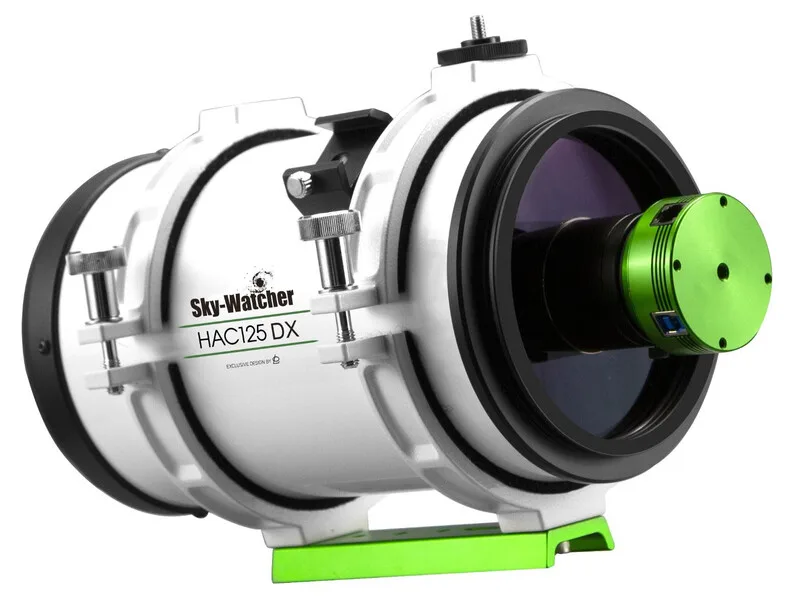
Aperture: 125 mm
Focal length: 250 mm
Aperture ratio: f/2
Maximum useful magnification: 250x
Tube weight: 3.82 kg
Tube length: 400 mm
Primary mirror construction: Mangin. A Mangin mirror's construction consists of a concave (negative meniscus) lens made of crown glass with spherical surfaces of different radii, with the reflective coating on the shallower rear surface. The mirror is a negative meniscus lens with the reflective surface on the rear side of the glass forming a curved mirror reflecting light without spherical aberration if certain conditions are met. This reflector was invented in 1874 by a French officer, Alphonse Mangin, as an improved catadioptric reflector for search lights.
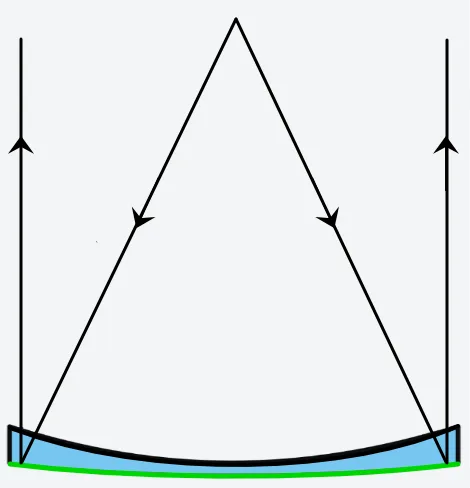
Mangin mirror
Accessories: Dew Shield, Integrated Corrector, Vixen-style Prism rail, Vixen/Skywatcher Level finder base, Tube clamps.
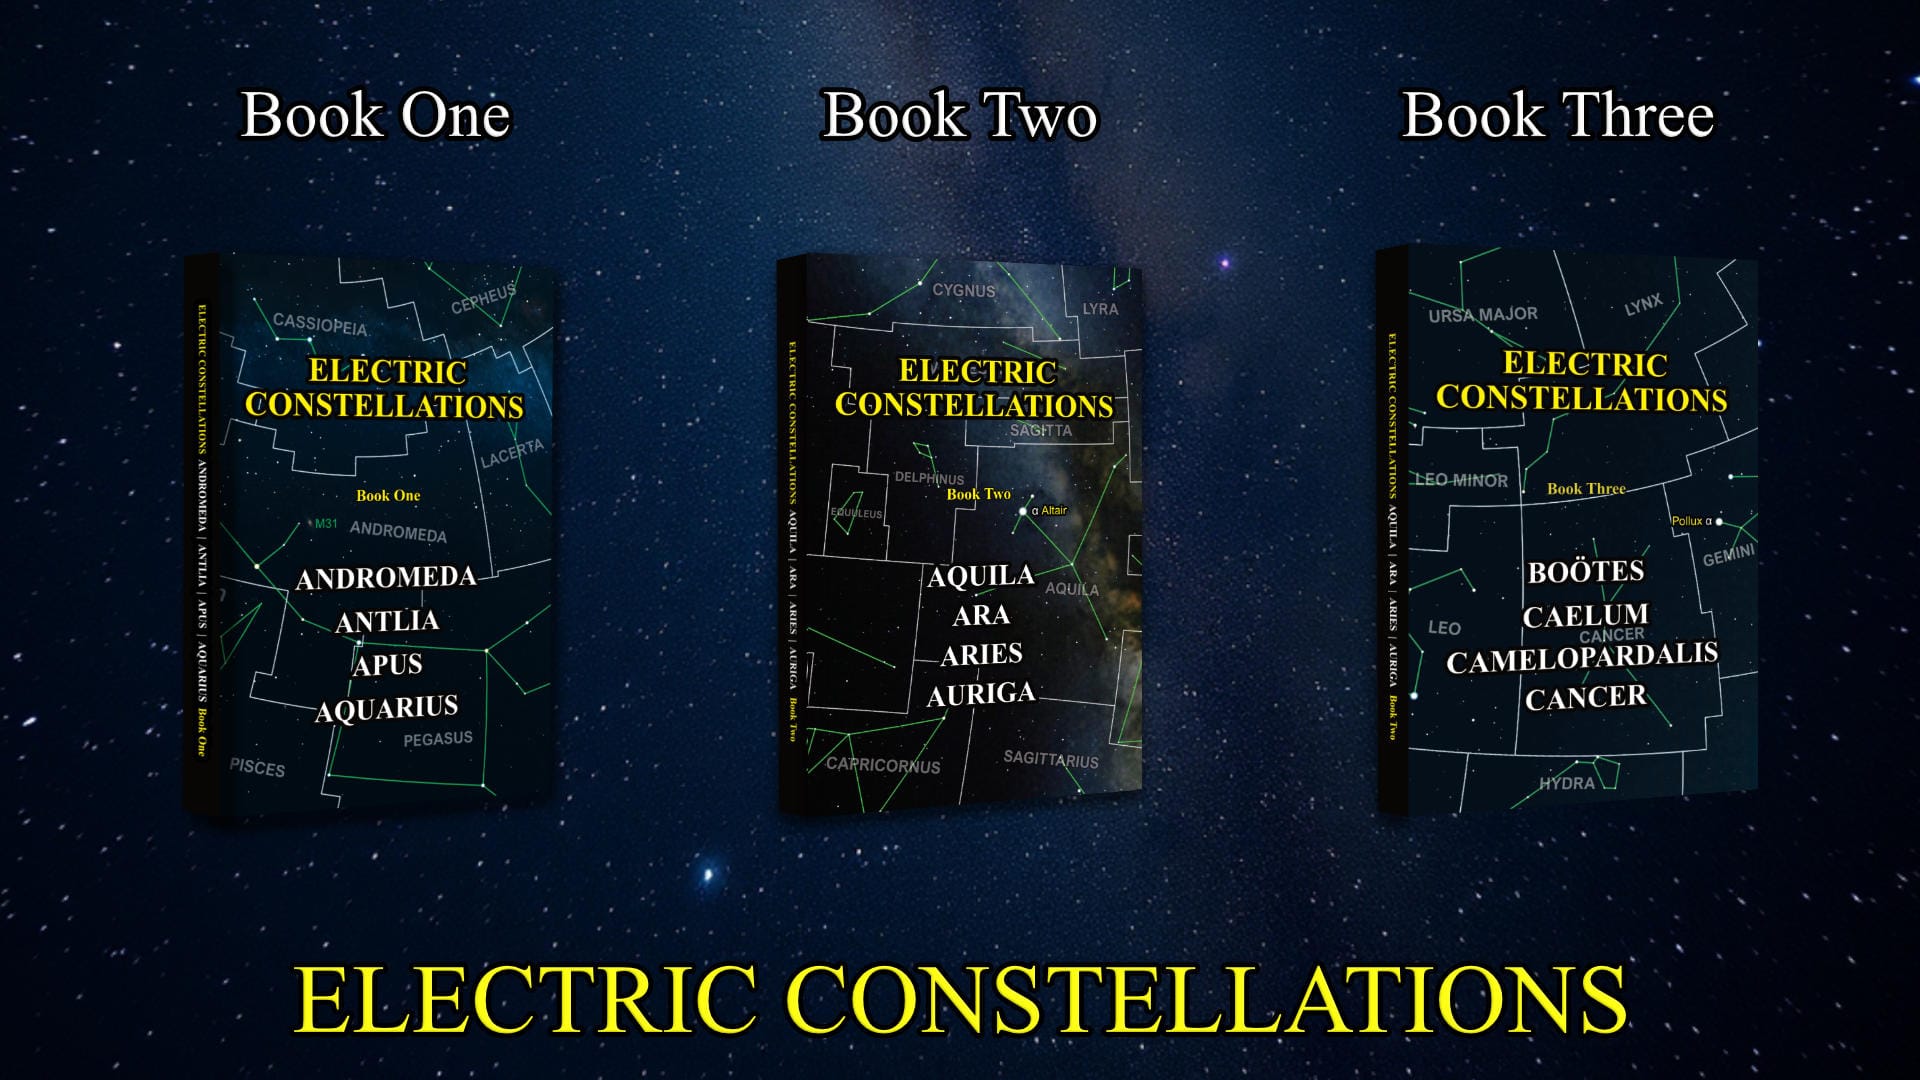
Challenge the standard model—explore the cosmos through the Electric Universe Theory. These Electric Constellations books contain full-color, data-rich investigations of four constellations each. They're not a beginner's star guide—they're a serious work for independent thinkers, astronomers, and scientifically literate readers seeking to understand the Universe beyond conventional gravity-based interpretations.
Each constellation is examined in detail, with attention to its Bayer-designated stars, mythological origins, meteor showers, and bordering constellations. In-depth profiles of deep-sky objects—including galaxies, planetary nebulae, and star clusters—are paired with high-resolution imagery from the Webb and Hubble space telescopes, delivering both scientific clarity and visual impact.
Central to this series is the Electric Universe (EU) model, which proposes that electromagnetic forces—not gravity alone—govern much of the structure and behavior of the cosmos. Rather than treating this as speculative fringe, the book frames the EU model as an evidence-based, plasma-physics-informed alternative to the standard cosmological narrative.
Inside each volume:
- Comprehensive coverage of four distinct constellations
- Analyses of deep-sky objects in the EU context
- Original commentary on plasma discharge features and Z-pinch configurations
- Mythological and historical context without romantic embellishment
Written for readers who demand more than rote repetition of gravitational dogma, Electric Constellations opens a new observational and theoretical frontier—where stars light by electrical currents, not fusion, and where structure emerges from plasma dynamics, not dark matter.
Whether you are an amateur astronomer, electrical engineer, or astrophysicist curious about alternative models, these books deliver a rigorous and visually stunning exploration of the night sky—illuminated by a very different current.
